Since the move I've been trying to make the place feel a little more like me, starting with my room. After
painting the walls and bringing life back to the
nightstands I felt like I was in the home stretch. I am obviously using most of my own furniture, but I still needed a headboard. I wanted something that would take up a large section of the wall, all the while allowing the vibrant blue to peek out. The size of the piece was also key. It's a big wall and I didn't want to fuss with lots of extra art. Keeping with the natural pallet was important to keep the room flowing well. After looking for a few weeks I couldn't find the headboard of my dreams, so i made one...
 |
| I really like the way the lace pops against the bright blue! |
This is what I came up with, and here's how I did it for about $15!
 |
| before |
 |
| after |
I took an old screen, deconstructed the frame and took off the black paint off exposing the natural wood (note, this wood wasn't too pretty right after, don't be intimidated). I did a few coats of stain and finished it off with a poly finish. I did the same process with six slats of wood, which I put into the frame to break up the inside pattern.
 |
I was using a lot of spray paint so
I took this part outside.
|
I took the same lace which I sprayed the top of the dressers with and sprayed it a similar color to the wood (the actual color has a little more metallic to mimic some of the gloss from the poly on the wood). I used a spray adhesive to adhere the lace to the back side of the frames pulling it tight as I was setting it, then cutting the excess lace to fit.
 |
Use felt pad sticker to protect the wall. I put
one on each corner and a few in the middle
for good measure. |
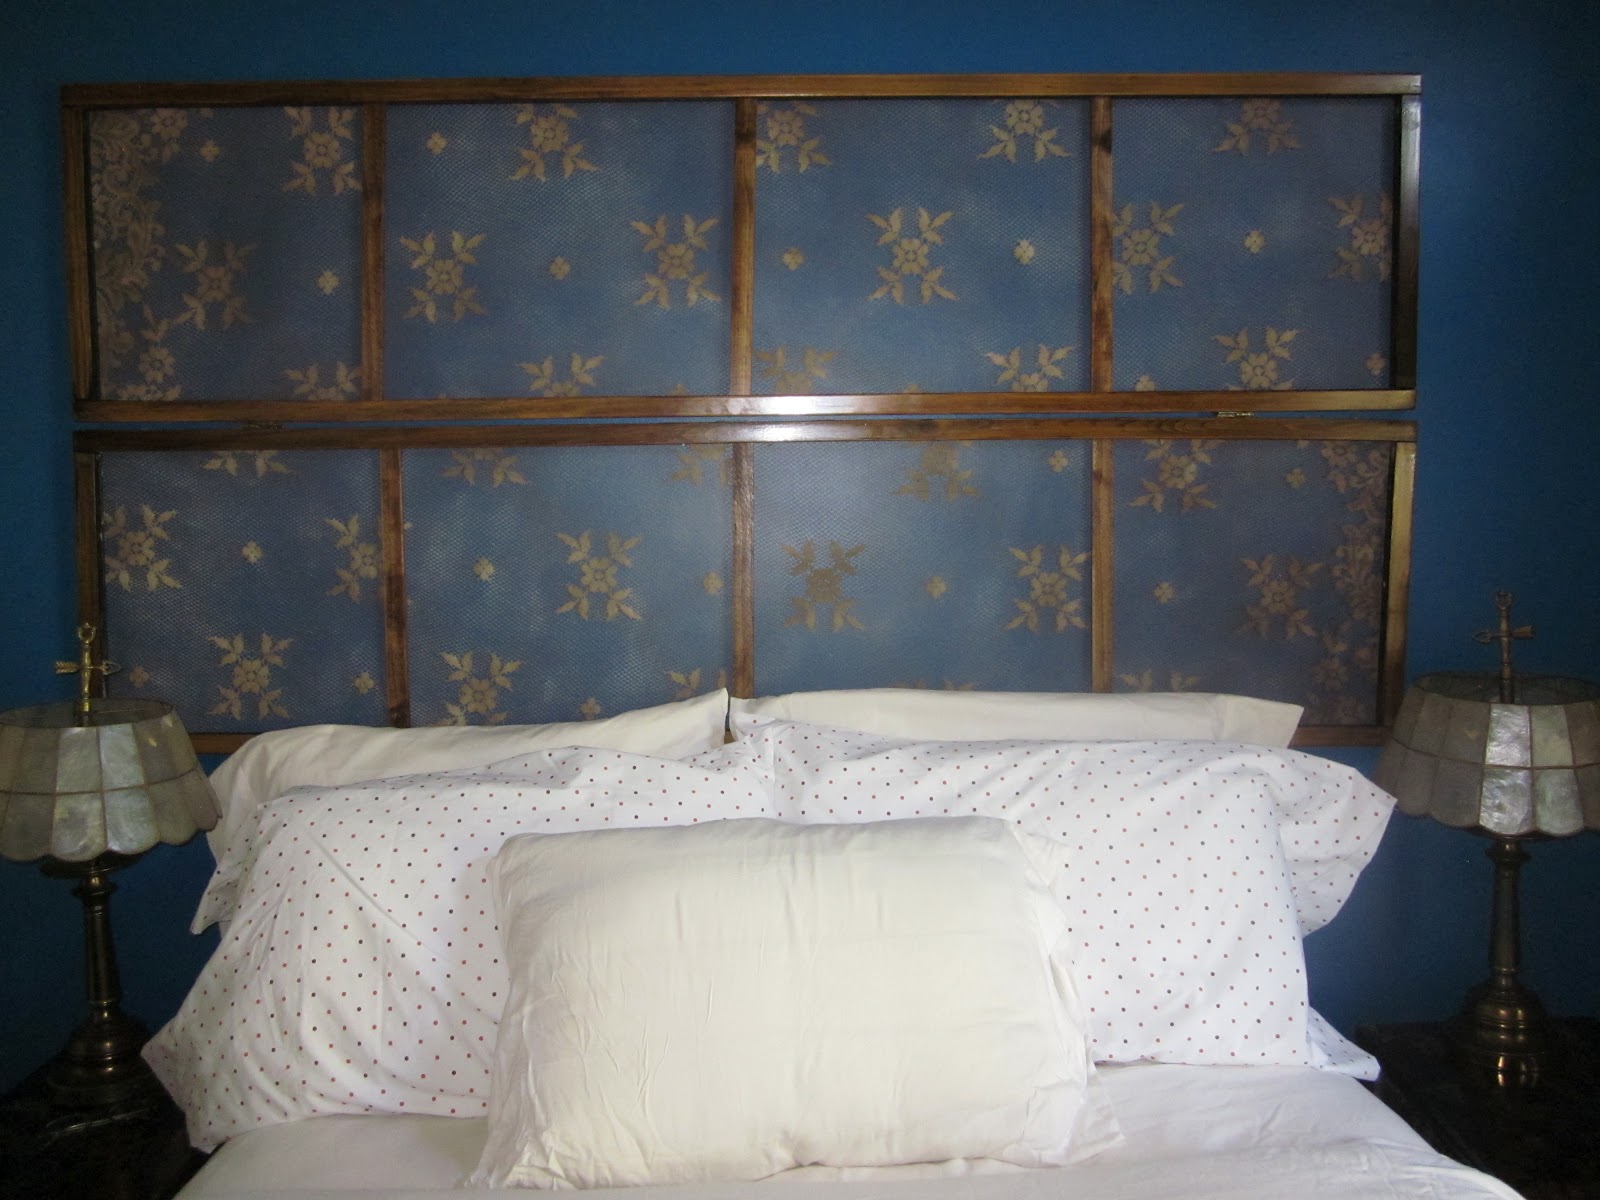
I reassembled two of the frames to give a better size. Knocking off the extra frame made it lighter and an easy size to fit on the wall above the bed. I placed a few felt pads on the back to protect the wall. Centering it on the wall I hung it on my wall with a few strategically placed nails.
|
| An easy day project with a real "WOW" impact. |


No comments:
Post a Comment